
Let’s Beat The Heat !
With Summer months coming in hot, you’re probably looking for a cool craft for your infant. Ice Cube Painting is a fun and refreshing way to engage your infant, while keeping their temperature down outside.
Water play during the summer isn’t just a way to beat the heat. It’s a multi-sensory learning experience that supports your child’s development in joyful, refreshing ways.
Benefits of Ice Cube Painting
Cognitive Development
- Cause and effect: Watching ice melt and colors spread teaches basic science concepts.
- Color recognition: Exposure to vibrant hues supports early visual learning.
- Problem-solving: Infants experiment with how to move and manipulate the ice.
Fine Motor Skills
- Grasping and holding: Picking up slippery cubes strengthens hand muscles.
- Hand-eye coordination: Guiding the ice across paper builds control and precision.
Sensory Exploration
- Temperature awareness: Cold sensations introduce new tactile experiences.
- Texture play: Wet, smooth, and melting ice engages multiple senses.
- Visual stimulation: Bright colors and changing patterns captivate attention.
Creative Expression
- Process art: No rules, just exploration—perfect for early creativity.
- Freedom to explore: Infants can make marks without pressure or expectations.
Emotional Regulation
- Calming effect: The cool temperature and slow melting can soothe overstimulation.
- Focus and engagement: Sensory-rich play helps infants stay present and curious.
Ready, Set, Paint!
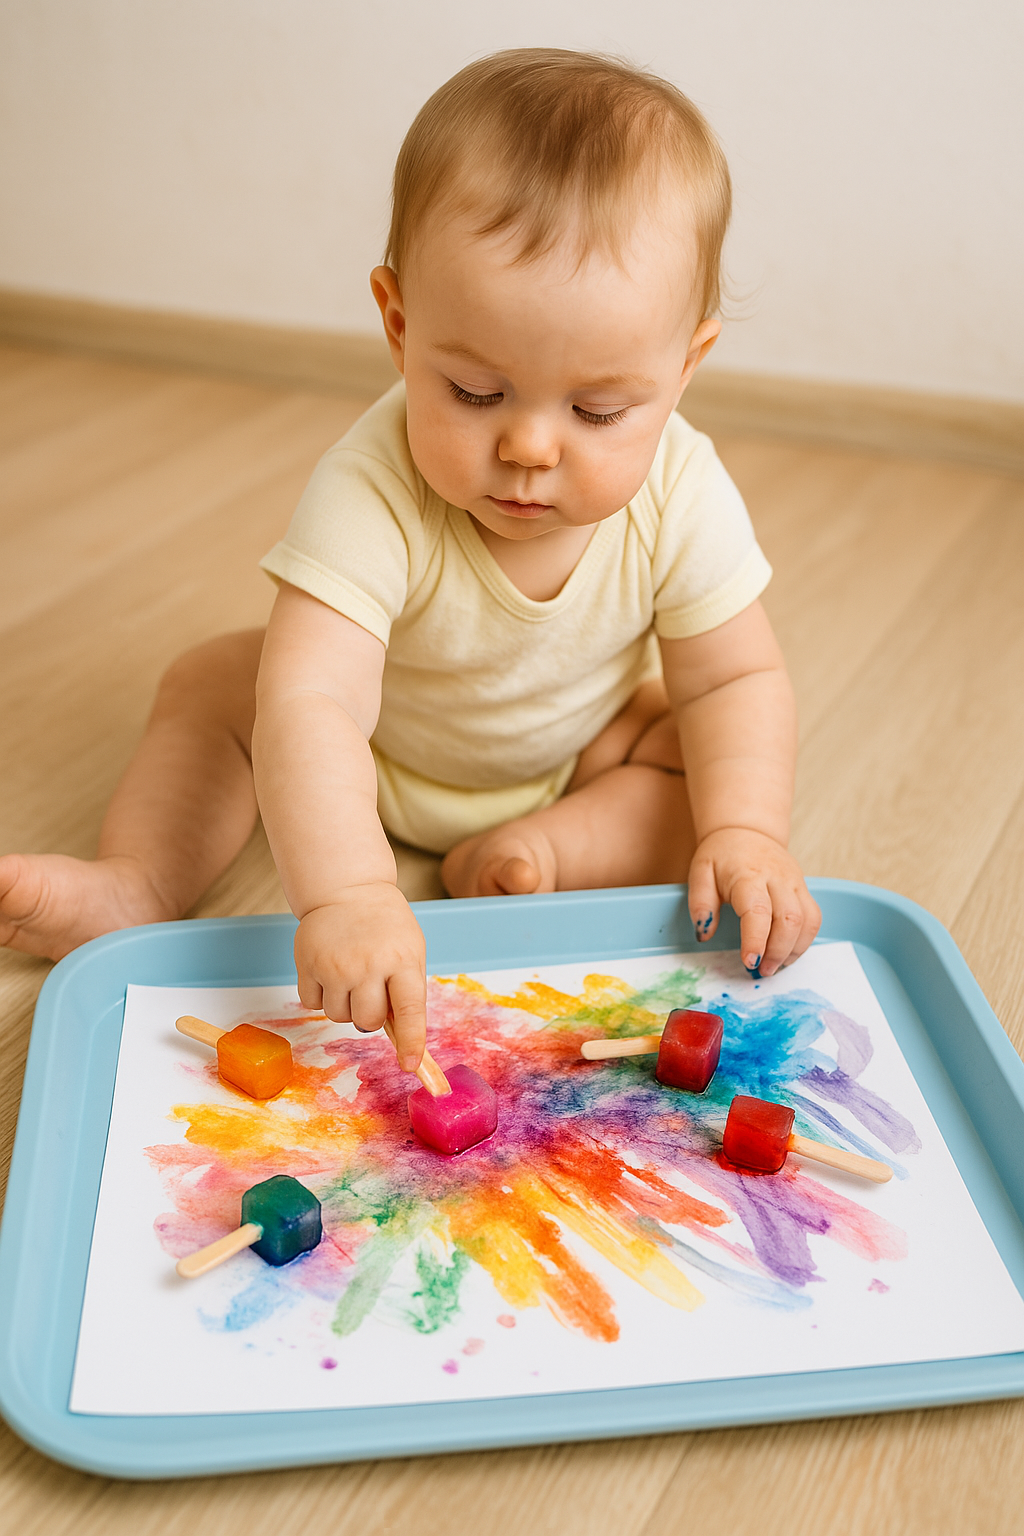
Here’s What You’ll Need:
- Ice cube tray
- Water
- Natural food coloring (or fruit/veggie juice like beet, blueberry, or spinach)
- Craft sticks or baby-safe spoons (optional for handles)
- Thick paper (like cardstock or watercolor paper)
- Tray or shallow bin (to contain the mess)
- Smock or old shirt (optional, but helpful!)
Directions:
- Make the ice paints:
- Fill each section of the ice cube tray with water.
- Add 1–2 drops of natural food coloring to each cube.
- Insert a craft stick or baby spoon into each cube (optional).
- Freeze until solid—usually 4–6 hours.
- Set up the painting station:
- Tape the paper to a tray or table to keep it from sliding.
- Place the ice cubes in a bowl or directly on the paper.
- Let them melt slightly so they glide more easily.
- Let your infant explore:
- Encourage them to touch, push, or hold the cubes.
- Watch as the colors melt and swirl across the paper.
- Stay close! This is a supervised activity, especially if they’re mouthing objects. Popsicle sticks, small, melted ice cubes and even spoons can and will end up in your child’s mouth.
- Clean up and dry:
- Blot excess water with a towel.
- Let the artwork dry flat.
- Hang it up or save it as a keepsake!
Top Tip: Take this craft outdoors! Set up a safe play area in the shade for your infant to sit and play with the ice paints. I like to use a kiddie pool with other sensory toys. Keep in mind, the heat will cause the ice to melt faster, so be prepared to offer backups!
RELATED: Edible Finger Paint